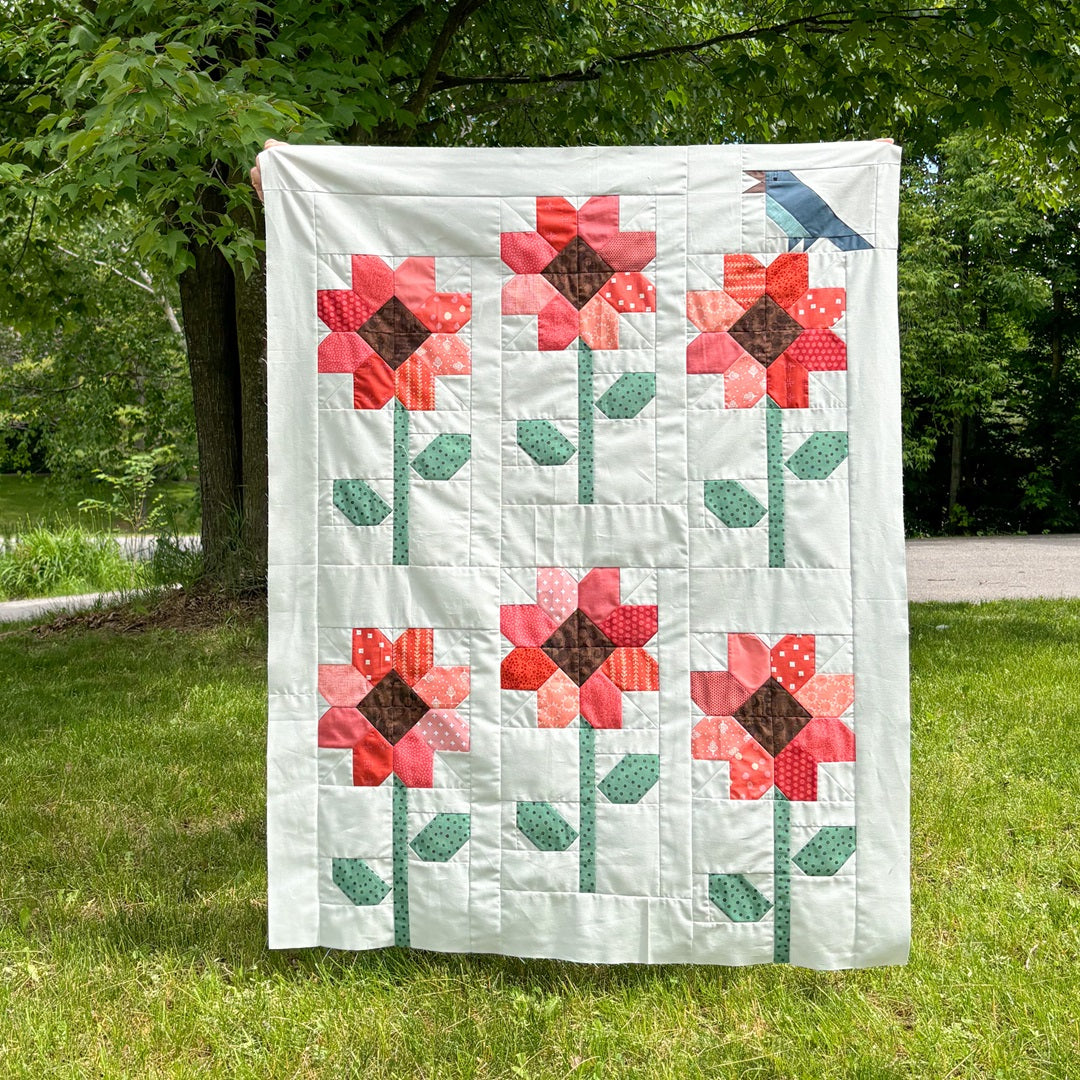
What if a sweet little bird landed on your beautiful Sunflowers quilt? Yes? Ok, let's add one! 😎
(Be sure to read to the end of this post for some extra project ideas, including a version with my Mini Sunflowers FPP pattern!)
A few notes before we start
- Finished quilt size: 64" x 75" or 40" x 51" (identical to Sunflowers in the throw and crib sizes)
- You will need the following patterns:
-
- Sunflowers (get the pdf or printed booklet)
- Little Crow (get the pdf)
- The fabric requirements for the quilt top are basically those of Sunflowers. Just have some extra scraps at hand for the little bird.
Cutting instructions
- You’ll need all the pieces from your Sunflowers pattern, except one fewer O piece, and the dimensions of two of your border strips slightly change, see table below.
Please note: If you already cut all the pieces from the Sunflowers pattern, you can trim your R-U pieces shorter and use your off-cuts and your extra O piece when making the bird section. - In addition, you’ll need three background pieces (BG1-BG3) for the bird section:

- Print the FPP templates for the large, left-facing crow from the Little Crow pattern.
- Use the off-cuts from the previous steps when preparing your pieces for the Little Crow block.
Piecing your bird and sunflowers quilt top
Making your sunflower blocks
- Make all your sunflower blocks as described in steps 1-13 of your Sunflowers pattern.
Making your bird block
- Piece a left-facing bird block as described in the Little Crow pattern.
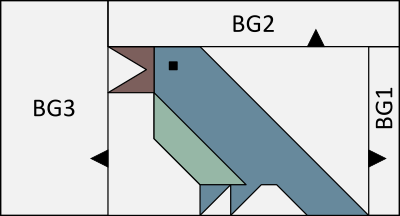
- RST, sew your BG1 piece to the right, then your BG2 piece to top, and finally your BG3 piece to the left of your bird block. Press your seams towards the BG1, BG2 and BG3 pieces.
Your completed bird section should measure 13 1/2" x 7 1/2".
Assembling your quilt sections
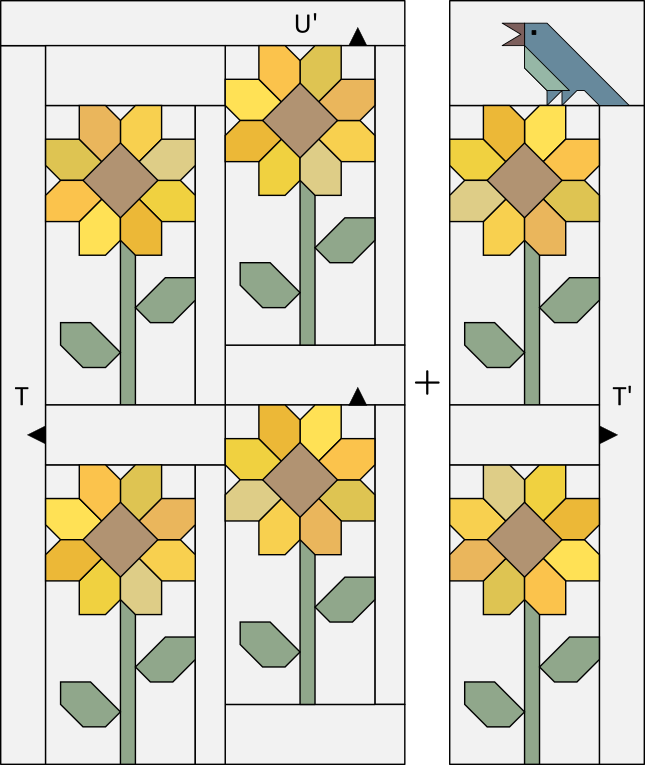
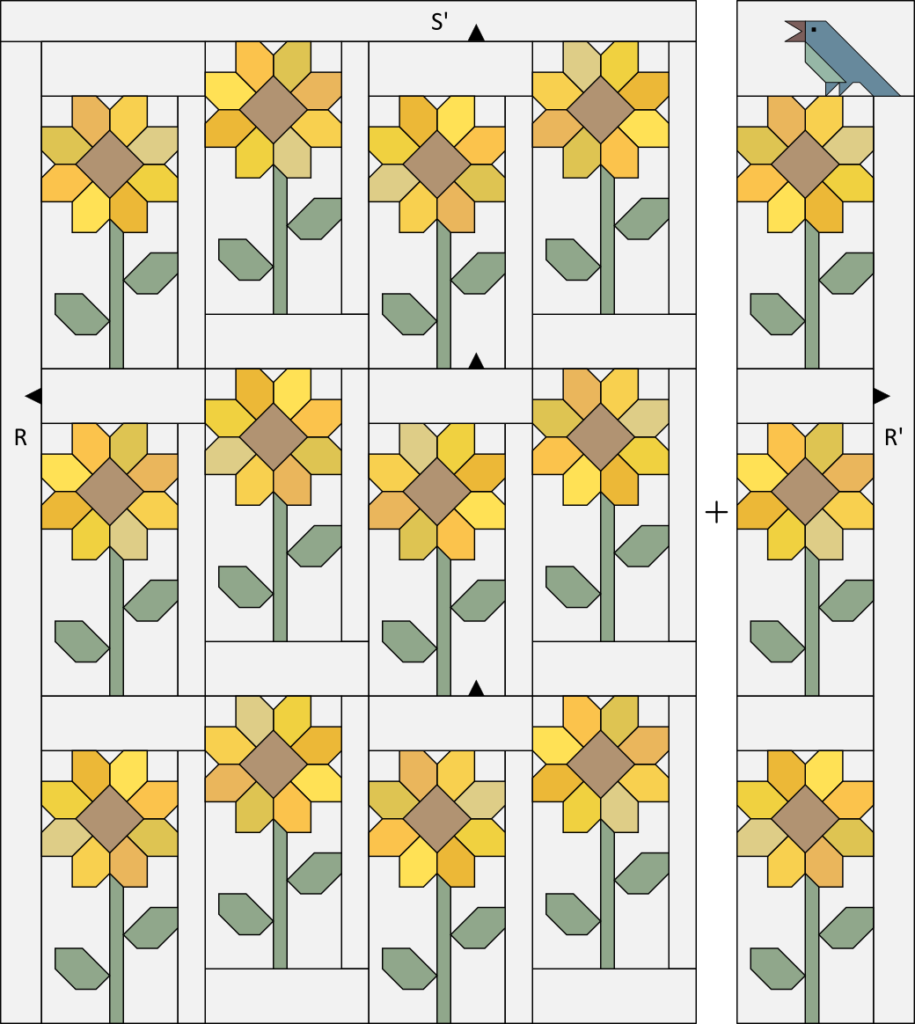
Refer to the two diagrams below when assembling your quilt top.
- Add your O, P and Q pieces to your sunflower blocks as described in steps 14-17 of your Sunflowers pattern, except to the sunflower block in the top right corner.
- Join the sunflower blocks along the right edge of your quilt top as a column.
- Add your R' piece (for the throw) / T' piece (for the crib quilt) to the right of your unit from step 5, then your bird section to the top.
- Join your remaining sunflower blocks as described in steps 18-19 of your Sunflowers pattern.
- Add your R piece (for the throw) / T piece (for the crib quilt) to the left of your unit from step 7, then your S' piece (for the throw) / U' piece (for the crib quilt) to the top.
- Join the two sections from steps 6 and 8.
Crib quilt:
Throw:
And that's it! Time to finish and use your bird and sunflowers quilt!
More sunflower mash-up projects
Extra visitors
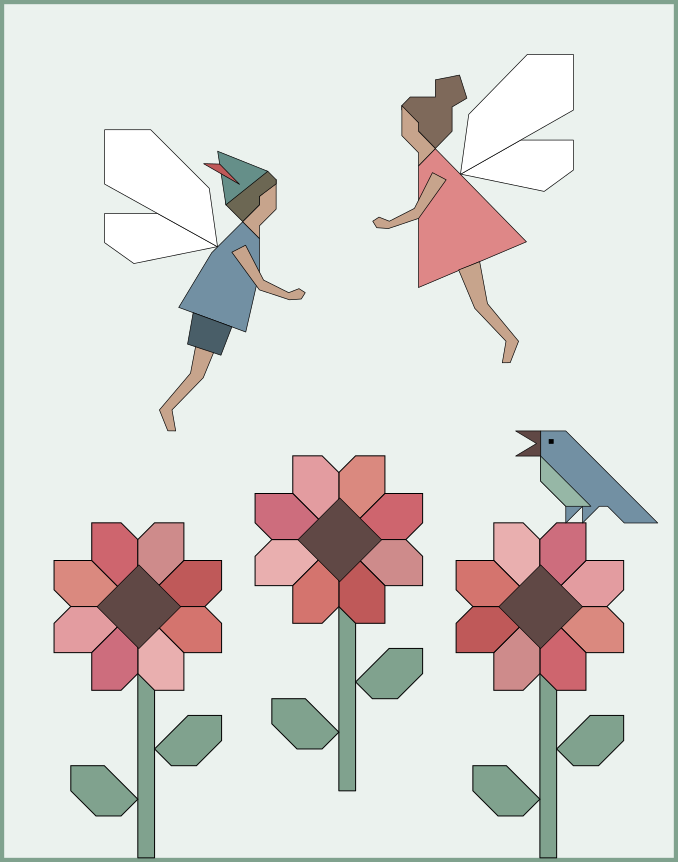
And if you wanted, you could always add more friends to your Sunflowers quilt! How about some fairies for example? The two quilts below could be made by removing three sunflower blocks and filling the resulting gap with the larger block sizes of my Fairy Folks FPP patterns (get the pdf or printed booklets):
Crib quilt (40" x 51"):
Throw (65" x 74"):
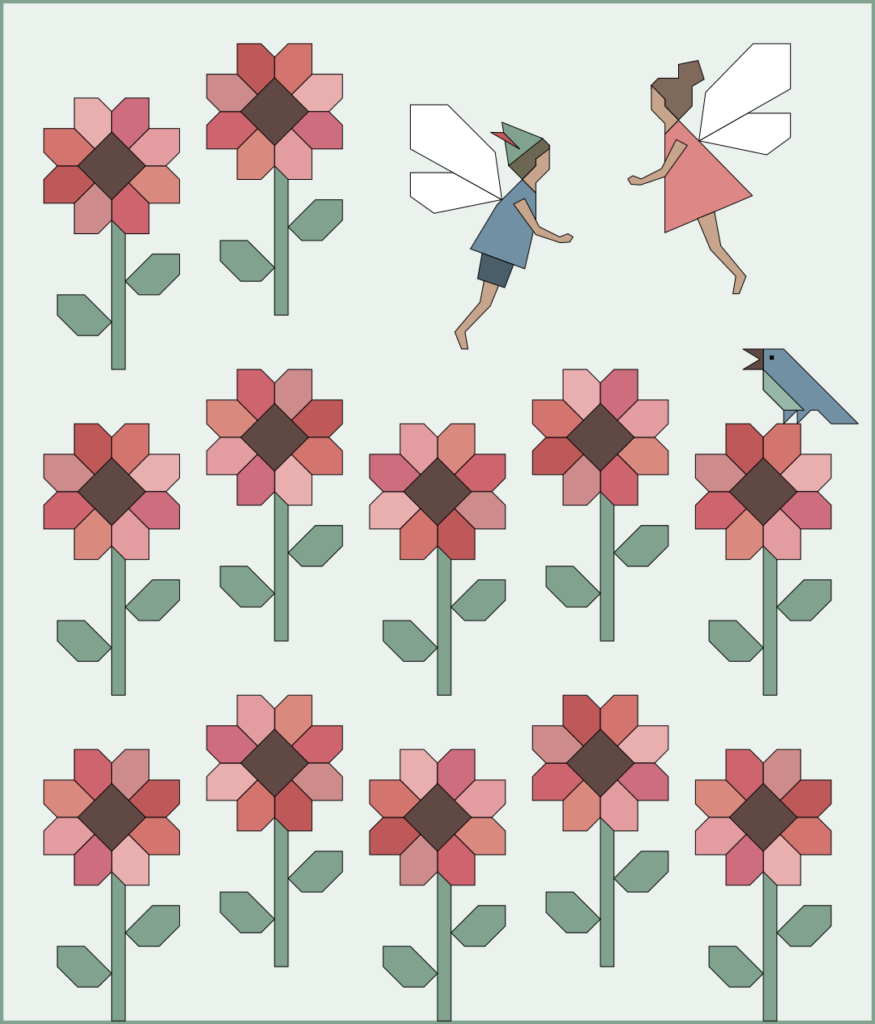
I have not yet figured out the exact dimensions of the required background pieces - please let me know if you need help with that!
What other patterns would you combine with Sunflowers? Dragons, Unicorns - you might be able to find some inspiration in my shop, lol! I can't wait to hear about your ideas!


Mini Sunflowers wall hanging
I liked the bird and flower combo so much, that I made a similar project using the cover sample of my free Mini Sunflowers FPP pattern (get it here). Check out this sweet wall hanging!
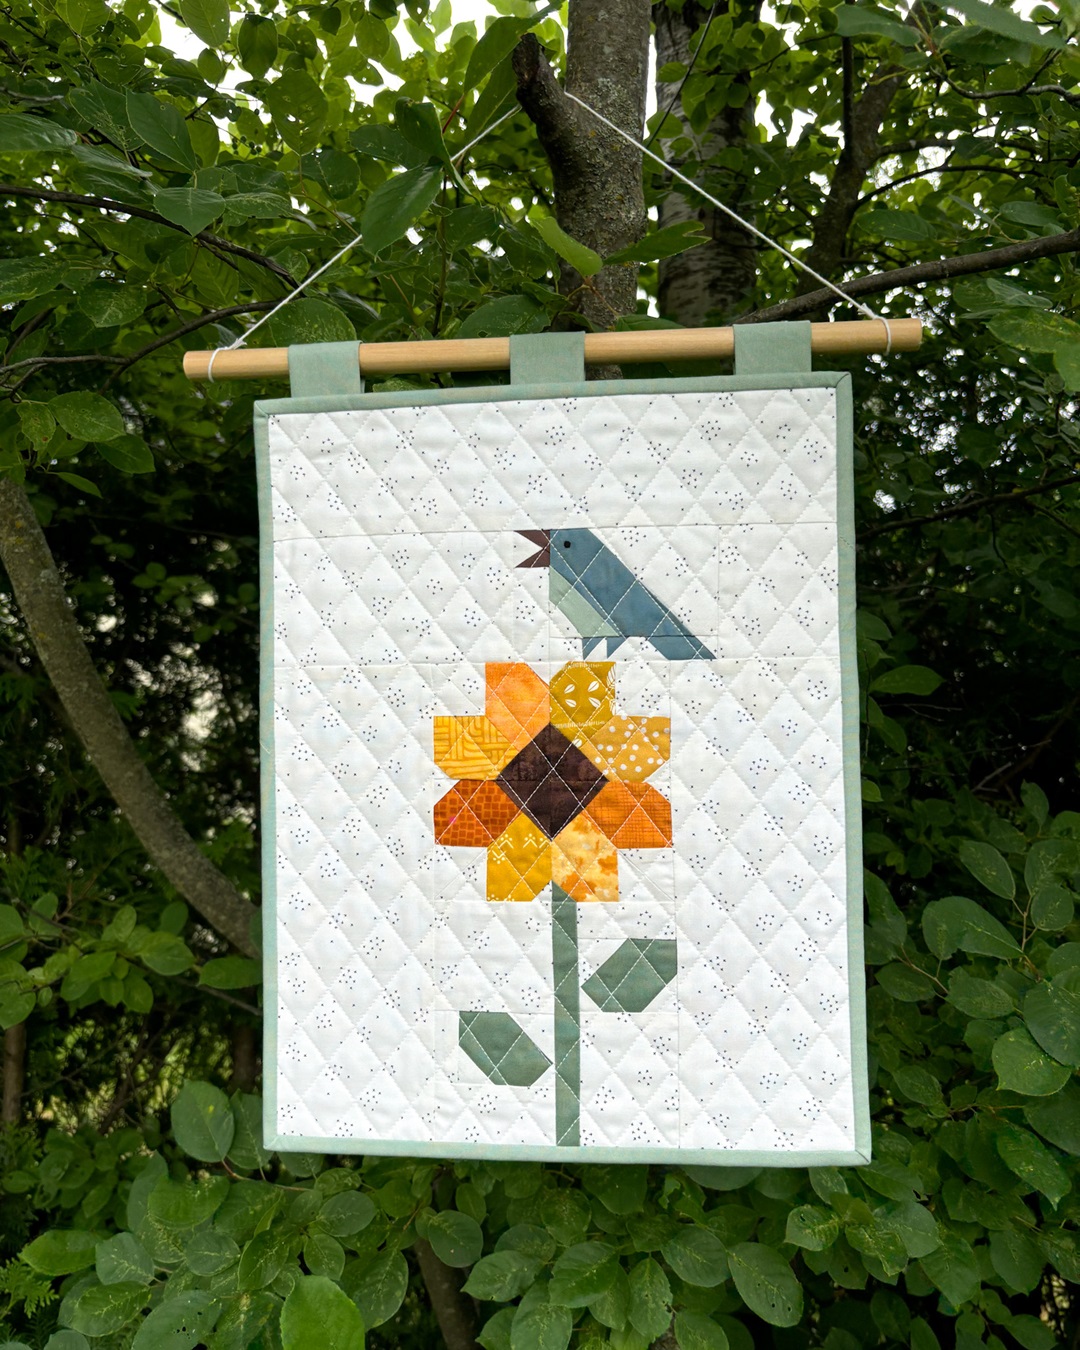
- Finished size: 12" x 15 1/2"
- Patterns:
- Fabric loops: detailed instructions in this wall hanging tutorial
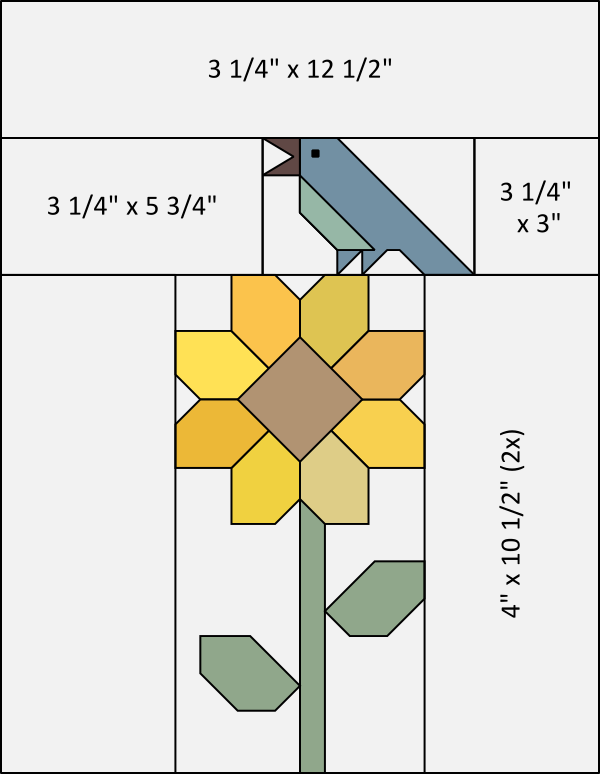
I think the assembly process is straight-forward enough that I don't need to provide more detailed instructions. The diagram below shows the dimensions of all the pieces I used.
Ok, I hope these were enough ideas for today. Please show me your version if you ma
